How to Frame Your Paint by Numbers The Easy Way
Article Summary
You've finished your beautiful paint by numbers! Now what? This simple guide shows you exactly how to use our DIY Wooden Frame Kit to give your canvas a professional, gallery-wrapped finish in minutes. No special tools needed – just stunning results ready to hang.
Completing a paint by numbers project brings an incredible sense of accomplishment. But seeing your finished artwork rolled up in a tube? Not quite as satisfying! Framing your masterpiece is the essential final step that transforms it into a piece of home décor you can proudly display.
While traditional framing can be expensive, achieving a modern, professional 'gallery wrap' finish is surprisingly easy with a DIY stretcher bar frame kit. This guide will walk you through the simple process, step-by-step.
Why Choose a DIY Stretcher Bar Frame?
Unlike a decorative frame that goes around your canvas, stretcher bars create an internal wooden skeleton behind it. Your canvas wraps around the edges, resulting in:
- A Modern, Borderless Look: Clean lines that let the artwork take centre stage.
- A Taut, Professional Canvas: Removes any wrinkles or creases from shipping and ensures your art lies perfectly flat.
- Ease and Affordability: Achieve a gallery-quality finish without the high cost of professional framing.
Ready to get started? You can find the perfect size for your canvas in our DIY Wooden Frame Kit product page.
Step-by-Step: Framing Your Canvas
Our kits are designed for simple assembly. Here’s all you need to do:
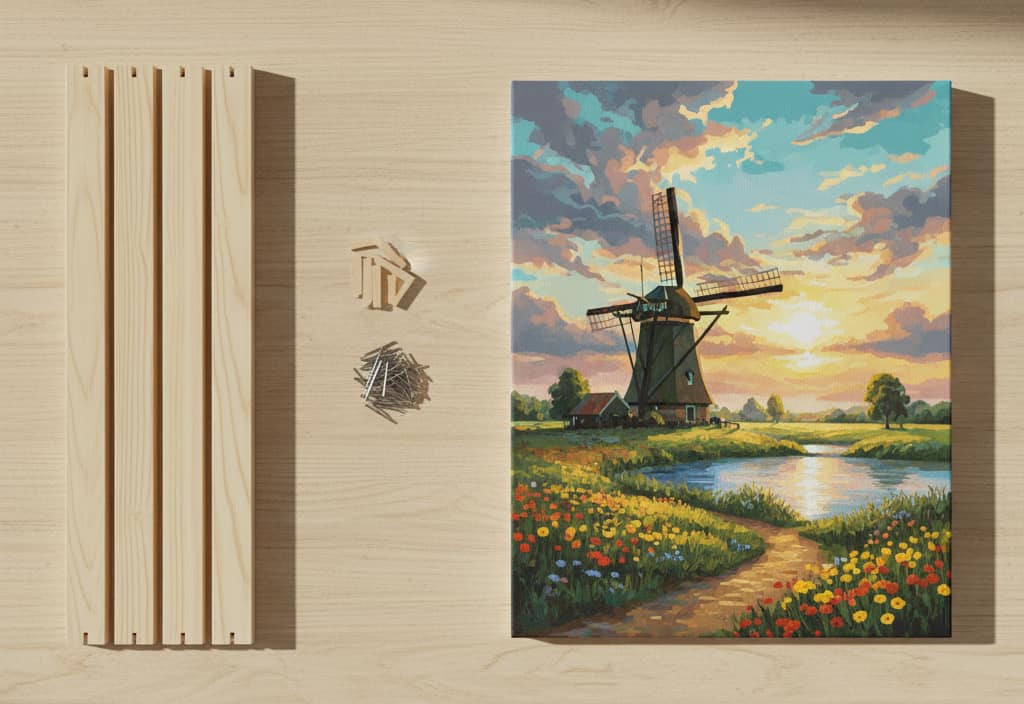
Step 1: Assemble the Frame
Take the four kiln-dried pine stretcher bars. Align the tongue-and-groove corners of two bars to form an 'L' shape and push them firmly together. Repeat with the remaining bars until you have a solid rectangular frame. No glue or screws needed!

Step 2: Position and Secure the Canvas
Lay your finished (and completely dry!) paint by numbers canvas face down on a clean, flat surface. Place the assembled wooden frame squarely onto the back of the canvas, ensuring the artwork is centred.
Carefully fold one edge of the canvas over the back of the frame bar. Secure it in the centre using one of the included thumbtacks. Repeat this on the opposite side, pulling the canvas taut before tacking. Then, do the same for the remaining two sides.
Continue adding tacks, working outwards from the centre towards the corners on each side, always pulling the canvas snug and alternating opposite sides to maintain even tension.

Fold the corners neatly (like wrapping a present) and secure them with tacks.
Step 3: Add Tension with Corner Keys
Your kit may include small wooden wedges called corner keys (or tension keys). Find the slots at the inner corners on the back of the frame. Gently tap one or two keys into each corner slot using a small hammer or similar object. This adds the final tension, ensuring your canvas is perfectly flat and drum-tight.

Step 4: Admire Your Work!
That's it! Your paint by numbers masterpiece is now professionally stretched and ready to hang. Find the perfect spot on your wall and enjoy the stunning results of your creative effort.

Ready to Frame Your Masterpiece?
Give your art the professional finish it deserves. Our DIY Frame Kits are easy to use and perfectly sized for your Paint on Numbers canvas.
Shop DIY Frame KitsNeed more tips? Explore our Ultimate Guide to Paint by Numbers.